
What Is Sintering — and Why Does Copper Filamet™ Require It?
Copper Filamet™ is a composite filament made of copper powder bound in a polymer matrix. When you print with it, you produce a green part — a shape that holds together but is not yet metal. Sintering is the heat-treatment process that burns away the binder and fuses the copper particles into a dense, conductive, solid copper object.
Without sintering, your print is fragile and non-functional as a metal part. With it, you get a part that is ~90% dense copper — conductive, machinable, and beautiful.
What You'll Need
- Copper Filamet™ — your printed green part
- Sintering Carbon — surrounds the part to create a reducing atmosphere and prevent oxidation
- Sintering Refractory Ballast – Steel Blend or Magnesium Silicate — supports the part and prevents slumping during sintering
- A sintering crucible (stainless steel or ceramic)
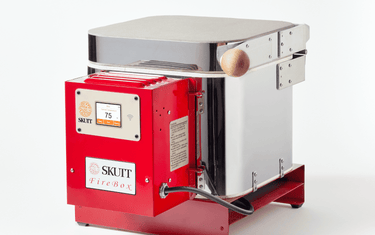
- A kiln capable of reaching 1,000°C+ — the FireX Sintering Kiln or FireX Max are purpose-built for this process
- Heat-resistant gloves and eye protection
Step-by-Step: Sintering Copper Filamet™
Step 1 — Inspect Your Green Part
Before sintering, check your green part for layer delamination, cracks, or warping. Minor surface imperfections are acceptable; structural cracks will worsen in the kiln. Handle green parts gently — they are brittle at this stage.
Step 2 — Prepare Your Crucible
Add a base layer of Sintering Refractory Ballast (about 1–2 cm deep) to your crucible. This supports the part and allows it to shrink freely without sticking to the crucible floor. For complex geometries, use Magnesium Silicate ballast, which flows more easily around fine features.
Step 3 — Bed the Part in Sintering Carbon
Place your green part on the ballast bed. Pack Sintering Carbon around and over the part, ensuring it is fully buried with at least 1 cm of carbon on all sides. The carbon creates a reducing atmosphere inside the crucible, preventing oxidation of the copper during the high-temperature sinter cycle.
Tip: Do not mix carbon and ballast — keep them in distinct layers. Ballast on the bottom, part in the middle, carbon surrounding the part.
Step 4 — Set Your Kiln Ramp Profile
Use the following temperature profile for copper:
- Ramp to 200°C at 1–2°C/min — slow initial ramp to drive off moisture
- Hold at 200°C for 30 minutes
- Ramp to 450°C at 1°C/min — binder burnout phase; go slowly to avoid cracking
- Hold at 450°C for 60 minutes
- Ramp to 1,000–1,050°C at 3–5°C/min — sintering phase
- Hold at peak temperature for 2–3 hours
- Cool naturally — do not force-cool; let the kiln cool to below 100°C before opening
The FireX and FireX Max kilns support programmable ramp-and-soak profiles, making this straightforward to set and repeat.
Step 5 — Unpack and Inspect
Once cooled, carefully remove the crucible and unpack your part from the carbon and ballast. Brush off residue with a soft brush. Your part will have shrunk approximately 15–20% linearly — this is expected and should be accounted for in your CAD design.
The surface will have a warm copper tone. You can leave it as-is, tumble-polish it for a bright finish, or patinate it for an antique look.
What to Expect: Shrinkage, Density, and Appearance
- Linear shrinkage: ~15–20% (scale your CAD model up by 1.18–1.25x to compensate)
- Density: ~85–92% of solid copper
- Conductivity: Electrically and thermally conductive
- Surface: Matte copper tone; polishable to a bright finish
Troubleshooting Common Issues
Warping or Slumping
Usually caused by insufficient ballast support or too-fast a temperature ramp through the binder burnout phase. Ensure the part is fully supported on all sides by ballast, and slow your ramp rate below 450°C.
Incomplete Sintering (Chalky or Fragile Part)
The peak temperature was too low or the hold time too short. Increase your peak hold to 3 hours, or raise peak temperature by 25°C and re-sinter.
Surface Oxidation (Black or Green Discoloration)
The part was not fully buried in Sintering Carbon, or the carbon was exhausted. Use fresh carbon and ensure complete coverage. Oxidation can sometimes be removed by re-sintering in fresh carbon.
Cracking During Sintering
Almost always caused by too-fast a ramp during binder burnout (200–450°C range). Slow this segment to 0.5–1°C/min for large or thick parts.
Frequently Asked Questions
Can I sinter copper in a regular pottery kiln?
Yes, if it reaches 1,050°C and you can program ramp-and-soak profiles. However, kilns purpose-built for metal sintering like the FireX offer better temperature uniformity and programmability.
Do I need a special atmosphere (hydrogen, nitrogen)?
No. The Sintering Carbon creates a self-contained reducing atmosphere inside the crucible. No gas supply is required.
How many times can I reuse sintering carbon and ballast?
Ballast is reusable many times — sieve out debris between uses. Sintering Carbon degrades over time; replace when it becomes powdery or loses its granular structure.
What's the difference between Refractory Ballast – Steel Blend and Magnesium Silicate?
Steel Blend is denser and better for flat-bottomed or simple geometry parts. Magnesium Silicate flows more freely and is preferred for complex geometries, thin walls, or parts with fine features. See our Steel Blend and Magnesium Silicate product pages for full specs.
Ready to Start Sintering?
Everything you need is available in our store. Start with Copper Filamet™, grab your Sintering Carbon and Refractory Ballast, and if you need a kiln, the FireX Sintering Kiln is the purpose-built solution for desktop metal printing.
Questions? Reach out — we're here to help you get to metal.